Cherry Studio API Setup and Import Guide
Step 1: Preparation
Before you start, prepare your TaoDock API key, sufficient account quota and an exact model ID from the model catalog. See the quick start if this is your first integration.
Install the desktop application from the Cherry Studio website.
Import from TaoDock
- Follow console import, choose Cherry Studio, and allow the browser to open it.
- Check the address and key in Cherry Studio's confirmation screen, then confirm.
- Open Settings → Model Provider, find the imported provider, fetch models, and enable the ones you need.
- In chat, select
gpt-6.1-solor another accessible model under that provider and send a message.
Add a provider manually
- Open Settings → Model Provider → New API. If this preset is unavailable, add an OpenAI-compatible provider named
TaoDockfor ordinary text chat. - Enter your TaoDock API key and set API Host to
https://taodock.com. - Fetch or manually add models, run a connection check, and enable the provider. Cherry Studio adds the version and endpoint paths to this root address.
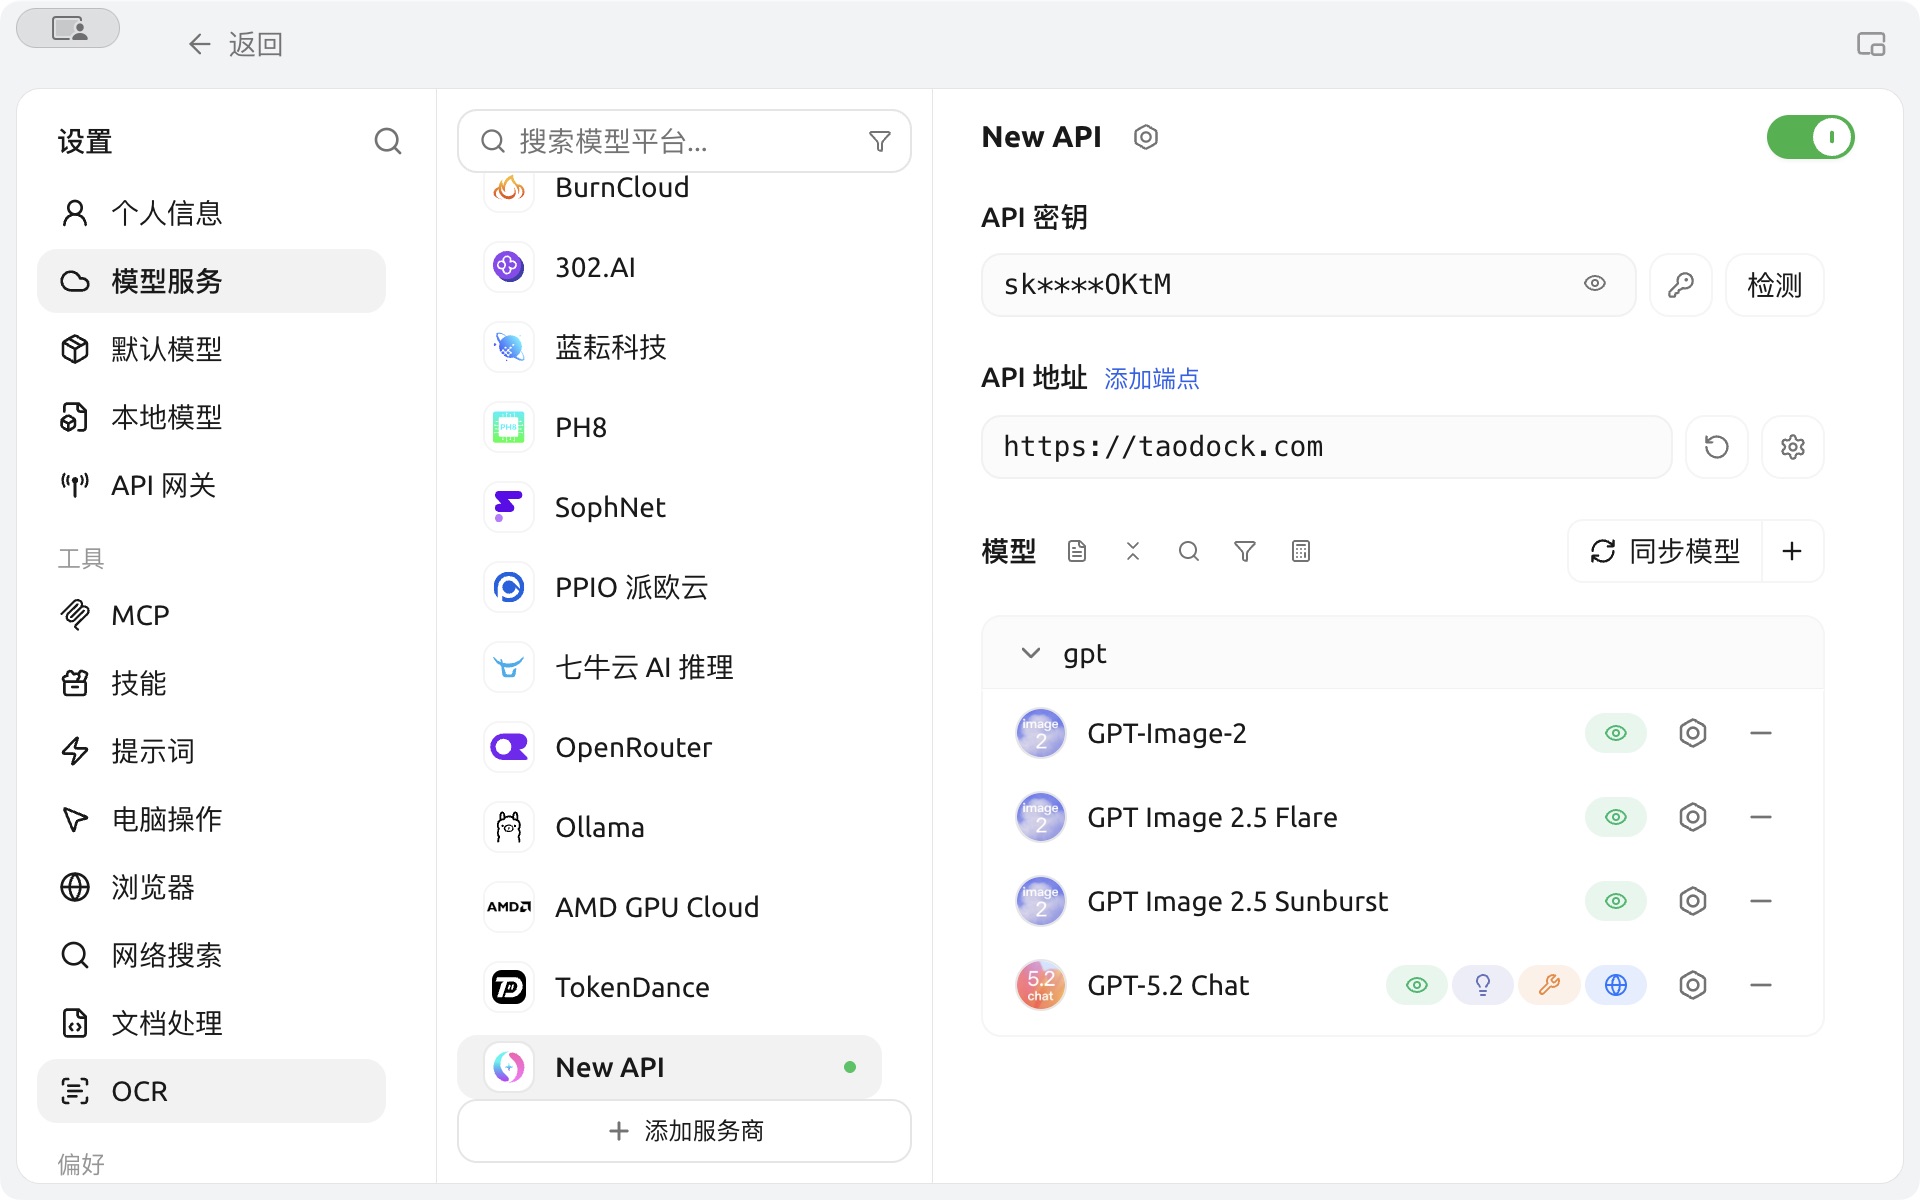
Follow Figure 1: ① Select Model Provider and New API; ② enter your own API key; ③ enter https://taodock.com; ④ use Sync Models (同步模型) or + to add models; ⑤ enable the provider with the top-right switch. The pictured list belongs to that configuration; select an accessible text model for ordinary chat.
See Cherry Studio's New API guide. An older OpenAI-compatible configuration requiring a versioned base address can use https://taodock.com/v1/ without appending chat/completions; see the connection settings.
Use Cherry Agents
Open Work / Agents in the left navigation, choose or create an Agent, select a TaoDock model compatible with its runtime mode, and choose a working directory. A mode requiring Anthropic Messages needs a model and protocol supporting that endpoint; changing an OpenAI connection's model name to Claude is insufficient.
If prompted to start the API Gateway, select Enable and Start or open Settings → API Gateway. After chat works, follow the first Agent task. See the official Agent model configuration and API Gateway guide.
Verify a real request
Select a model under the TaoDock connection and send a short test message. Confirm that a normal response arrives and that a matching request appears in TaoDock request logs. Loading a model list verifies model discovery; sending a message may consume quota.
For Agent workflows, also follow the file tool verification. A normal text reply alone does not establish tool support.
Troubleshooting
| Symptom | What to check |
|---|---|
| HTML response or 404 | Use the API domain, check protocol selection and avoid duplicated version or endpoint paths |
| 401 or invalid key | Copy your complete, active TaoDock API key |
| Missing or unavailable model | Copy the exact model ID and check key restrictions and the selected group |
| Insufficient quota | Check both the account balance and API key quota |
| Chat works but tools fail | Verify the protocol, model capability and the application's tool permissions |
Return to all client integration guides or see the FAQ for more help.